

Nginx流量复制
需求
将生产环境的流量拷贝到预上线环境或测试环境,这样做有很多好处,比如:
- 可以验证功能是否正常,以及服务的性能;
- 用真实有效的流量请求去验证,又不用造数据,不影响线上正常访问;
- 这跟灰度发布还不太一样,镜像流量不会影响真实流量;
- 可以用来排查线上问题;
- 重构,假如服务做了重构,这也是一种测试方式;
为了实现流量拷贝,Nginx提供了ngx_http_mirror_module模块
安装Nginx
首页,设置yum仓库。为此,创建一个文件
/etc/yum.repos.d/nginx.repo
将以下内容写入文件
1.[nginx-stable]
2.name=nginx stable repo
3.baseurl=http://nginx.org/packages/centos/$releasever/$basearch/
4.gpgcheck=1
5.enabled=1
6.gpgkey=https://nginx.org/keys/nginx_signing.key
7.module_hotfixes=true
8.
9.[nginx-mainline]
10.name=nginx mainline repo
11.baseurl=http://nginx.org/packages/mainline/centos/$releasever/$basearch/
12.gpgcheck=1
13.enabled=0
14.gpgkey=https://nginx.org/keys/nginx_signing.key
15.module_hotfixes=true yum安装nginx
默认情况下,nginx配置文件是nginx.conf
一般情况下,nginx.conf文件在 /usr/local/nginx/conf 或者 /etc/nginx 或者 /usr/local/etc/nginx 目录下
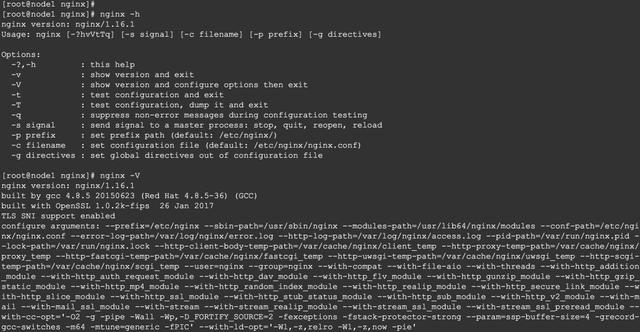
为了启动nginx,直接在命令行里输入nginx回车即可
1.# 启动
2.nginxnginx
3. # fast shutdown
4.nginx -s stop
5.# graceful shutdown
6.nginx -s quit
7.# reloading the configuration file
8.nginx -s reload
9.# reopening the log files
10.nginx -s reopen
11.# list of all running nginx processes
12.ps -ax | grep nginx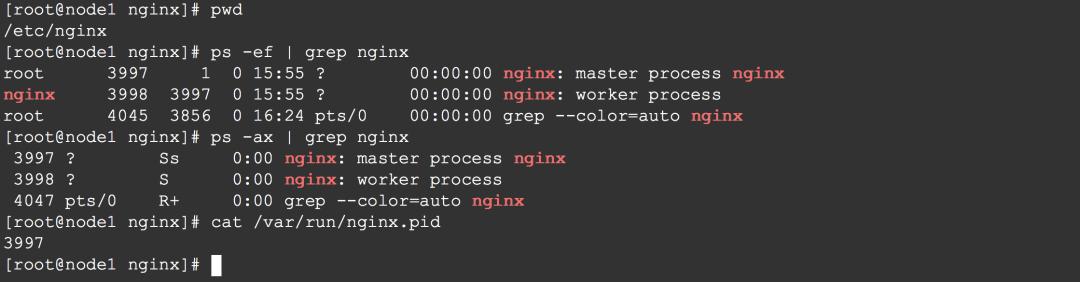

一旦master进程接收到重新加载配置的信号,它将检查新配置文件的语法是否正确,并尝试应用其中提供的配置。如果成功,master进程将启动新的worker进程,并发送消息给旧的worker进程,要求他们shutdown。否则,master进程将回滚所做的更改,并继续使用旧配置。旧的worker进程在接收到关闭命令后,停止接受新的连接,直到所有之前已经接受的连接全部处理完为止。之后,旧的worker进程退出。
nginx的master进程的进程ID,默认情况下,放在nginx.pid文件中,该文件所在的目录一般是/usr/local/nginx/logs 或者 /var/run
还可以这样停止nginx
初始配置文件长这样:
1.user  nginx;
2.worker_processes  1;
3.
4.error_log  /var/log/nginx/error.log warn;
5.pid        /var/run/nginx.pid;
6.
7.
8.events {
9.       worker_connections  1024;
10. }
11.
12.
13.http {
14.     include       /etc/nginx/mime.types;
15.     default_type  application/octet-stream;
16.
17.    log_format  main  '$remote_addr - $remote_user [$time_local] "$request" '
18.                                 '$status $body_bytes_sent "$http_referer" '
19.                                '"$http_user_agent" "$http_x_forwarded_for"';
20.
21.    access_log  /var/log/nginx/access.log  main;
22.    sendfile        on;
23.    #tcp_nopush     on;
24.
25.    keepalive_timeout  65;
26.
27.    #gzip  on;
28.
29.    include /etc/nginx/conf.d/*.conf;
30.}
31.
ngx_http_mirror_module
The ngx_http_mirror_module module (1.13.4) implements
mirroring of an original request by creating background
mirror subrequests. Responses to mirror subrequests are ignored.
我是这样理解的,这里,mirror本意是镜子、镜像,这里可以理解就像一个镜像站点一样,将所有的请求都收集起来,这个镜像就代表了所有真实有效的原始请求。有了这个镜像,后续我们才可能用这个镜像去做一些事情,比如重现一下所有的请求,这就实现了把线上的流程复制到别的地方。
官网给出的示例倒是很简单,如下:
1.location / {
2.    mirror /mirror;
3.    proxy_pass http://backend;
4.}

5.
6.6.

internal;    proxy_pass http://test_backend$request_uri;}
如果请求体为镜像,那么在创建子请求之前会先读取请求体
1.location / {
2.    mirror /mirror;
3.    mirror_request_body off;
4.    proxy_pass http://backend;
5.}
6.
7.location = /mirror {
8.    internal;
9.    proxy_pass http://log_backend;
10.  proxy_pass_request_body off;
11.  proxy_set_header Content-Length "";
12.  proxy_set_header X-Original-URI $request_uri;
13.}
前面我们安装了Nginx,但是里面没有包含我们所需的ngx_http_mirror_module模块,因此,真正要使用的时候最好还是采用自定义安装,即从源码构建
首先,下载源码
http://nginx.org/en/download.html
接下来,编译安装,例如:
1../configure
2.      --sbin-path=/usr/local/nginx/nginx
3.      --conf-path=/usr/local/nginx/nginx.conf
4.      --pid-path=/usr/local/nginx/nginx.pid
5.      --with-http_ssl_module
6.      --without-http_limit_req_module
7.      --without-http_mirror_module
8.      --with-pcre=../pcre-8.43
9.      --with-zlib=../zlib-1.2.11
10.    --add-module=/path/to/ngx_devel_kit
11.    --add-module=/path/to/lua-nginx-module
12.
13.make & make install
配置
1.upstream api.abc.com {
2.  server 127.0.0.1:8080;
3.}
4.
5.upstream tapi.abc.com {
6.       server 127.0.0.1:8081;
7.}
8.
9.server {
10.       listen 80;
11.   # 源站点
12.      location /api {
13.       proxy_pass http://api.cjs.com;
14.        proxy_set_header Host $host;
15.        proxy_set_header X-Real-IP $remote_addr;
16.        proxy_set_header X-Forwarded-For $proxy_add_x_forwarded_for;
17.
18.        # 流量复制
19.  mirror /newapi;
20.  mirror /mirror2;
21.  mirror /mirror3;
22.
23.    # 复制请求体
24.  mirror_request_body on;
25.    }
26.    # 镜像站点
27.    location /tapi {
28.        proxy_pass http://tapi.cjs.com$request_uri;
29.        proxy_pass_request_body on;
30.        proxy_set_header Host $host;
31.        proxy_set_header X-Real-IP $remote_addr;
32.        proxy_set_header X-Forwarded-For $proxy_add_x_forwarded_for;
33.    }
34.}
文档
1.Nginx文档
2.http://nginx.org/en/docs/
3.http://nginx.org/en/docs/http/ngx_http_mirror_module.html
4.http://nginx.org/en/docs/beginners_guide.html
5.http://nginx.org/en/docs/http/ngx_http_core_module.html#location
6. http://nginx.org/en/docs/configure.html
7.
8.第三方模板
9. http://luajit.org/
10.https://www.nginx.com/resources/wiki/
11.https://www.nginx.com/resources/wiki/modules/lua/
12.https://www.nginx.com/resources/wiki/modules/index.html
13.https://github.com/openresty/lua-nginx-module
补充
1.# 查看进程运行时间
2.ps -eo pid,user,lstart,etime,cmd | grep nginx
3.# 查看已经建立连接的数量
4.netstat -an | grep ESTABLISHED | wc -l
5.# 查看80端口的连接数
6.netstat -an | grep ":80" | wc -l
好啦!今天的分享到这里就结束了,希望大家持续关注马哥教育官网,每天们都会有大量优质内容与大家分享。声明;文章转载于马哥教育官网,版权归原作者所有!